


 Electrical Safety
How to Inspect an Electrical Panel for Rust and Corrosion
 Michael Roberts
 Jul 29, 2026
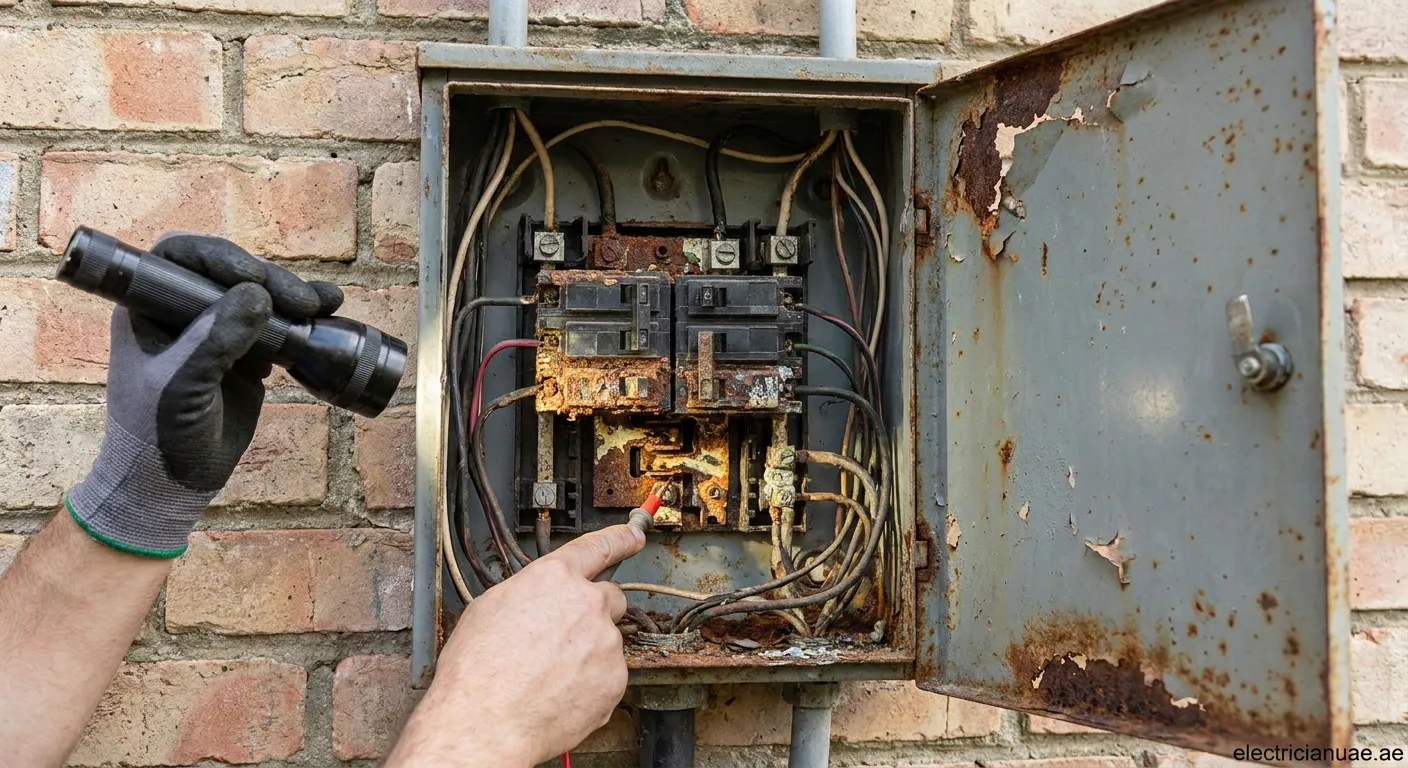
Electrical panels deteriorate over time due to moisture exposure causing dangerous rust buildup inside breaker boxes threatening fire safety throughout entire homes.
Why Inspecting Your Electrical Panel Matters
How to inspect an electrical panel for rust and corrosion starts with understanding why this task is crucial for every homeowner. Your electrical panel distributes power throughout your home while protecting circuits from overload.
Rust and corrosion compromise this critical system, leading to:
- Poor electrical connections
- Increased fire risk
- Frequent breaker trips
- Costly equipment damage
- Potential electrocution hazards
When to Perform Inspections
Schedule inspections annually or after water exposure events such as basement flooding, roof leaks near the panel, or high humidity periods.
Essential Tools Needed
Gather these items before beginning:
- Flashlight with bright LED beam
- Non-contact voltage tester
- Digital camera or smartphone
- Insulated screwdriver
- Clean, dry cloth
- Safety glasses
- Rubber-soled shoes
⚠️ Safety Warning: Never touch exposed wires or components while the main breaker is on.
Step-by-Step Inspection Process
Step 1: Disconnect Power Safely
Locate your main breaker and switch it to "OFF". Use a non-contact voltage tester to confirm power disconnection.
Step 2: Remove the Panel Cover
Carefully remove screws securing the panel door using your insulated screwdriver. Set screws aside safely.
Step 3: Conduct Visual Examination
Inspect the panel interior for visible signs:
- White or green powder on copper wires indicates oxidation
- Brown or orange discoloration suggests advanced corrosion
- Rust streaks along metal surfaces
- Water stains or mineral deposits on panel walls
- Pitted surfaces on bus bars
Step 4: Check Wire Connections
Examine where wires connect to breakers:
"Corroded wire connections create resistance points that generate heat during current flow." — National Electrical Code guidelines emphasize maintaining clean connections.
Look for discolored wire insulation, loose wires at corroded terminals, melted or brittle insulation, and burn marks around breaker terminals.
Step 5: Assess Breaker Condition
Individual circuit breakers should operate smoothly:
| Sign | Severity | Action Required |
|---|---|---|
| Surface rust | Low | Monitor closely |
| Corroded terminals | High | Replace immediately |
| Stuck mechanism | Critical | Professional replacement |
| Cracked housing | Critical | Urgent replacement |
Step 6: Examine Grounding System
The grounding bar connects all ground wires and bonds to earth. Check for loose ground wire connections, verify grounding conductor integrity between panel and ground rod outside, ensure no rust has compromised grounding straps or clamps, and test continuity if proper equipment is available.
Common Causes of Panel Corrosion
Understanding root causes helps prevent future issues:
Moisture Intrusion - Primary Culprit:
- Panel installed below grade level in basements,
- Missing or damaged weatherproofing seals outdoors,
- Condensation from temperature fluctuations inside enclosed spaces,
- Plumbing leaks located above or near electrical panels.
Chemical Exposure Sources:
- Industrial environments producing corrosive atmospheres nearby,
- Salt air exposure affecting coastal area properties,
- Household chemicals stored too close without ventilation.
Protect Your Electrical System
Regular inspection of your electrical panel prevents costly repairs and ensures home safety. If you discover significant corrosion or damage during your inspection, contact a licensed electrician immediately. We also offer professional services in The Thanyah 1 area Electrical-maintenance The Thanyah 1 for comprehensive electrical system assessment and maintenance.
 electrical panel inspection, rust corrosion, electrical safety, panel maintenance
