How to Wire an Industrial Socket: Step-by-Step Guide
Understanding how to wire an industrial socket correctly is essential for maintaining workplace safety and ensuring reliable power distribution in manufacturing environments.
How to wire an industrial socket correctly requires understanding of electrical systems and safety protocols. Industrial sockets differ significantly from residential outlets in terms of voltage ratings, current capacity, and wiring complexity.
Required Tools and Materials
Before starting the installation process, gather these essential items:
- Industrial-grade socket unit (appropriate voltage rating)
- Multimeter for voltage testing
- Wire strippers and cable cutters
- Screwdrivers (flathead and Phillips)
- Cable glands and glanding nuts
- Earth continuity tester
- Appropriate gauge cables
- Terminal blocks if required
- Insulation tape
- PPE (Personal Protective Equipment)
Safety Precautions First
Always prioritize safety when working with electrical systems:
- Disconnect all power sources before beginning any work
- Use lockout/tagout procedures to prevent accidental re-energization
- Verify the circuit is de-energized using a multimeter
- Wear appropriate PPE including insulated gloves and safety glasses
- Ensure adequate lighting in the work area
- Have emergency procedures in place
Understanding Industrial Socket Types
Industrial sockets come in various configurations based on application:
| Type | Voltage | Current Rating | Common Use |
|---|---|---|---|
| 3-pin | 230V | 16A | Light machinery |
| 4-pin | 400V | 32A | Three-phase motors |
| 5-pin | 400V | 63A | Heavy equipment |
| 7-pin | Various | Various | Specialized applications |
Identifying Terminal Connections
When learning how to wire a industrial socket, proper terminal identification is crucial:
- L1, L2, L3: Phase terminals (three-phase systems)
- N: Neutral terminal
- PE/E: Protective earth/ground terminal
- Terminals are typically marked clearly on quality units
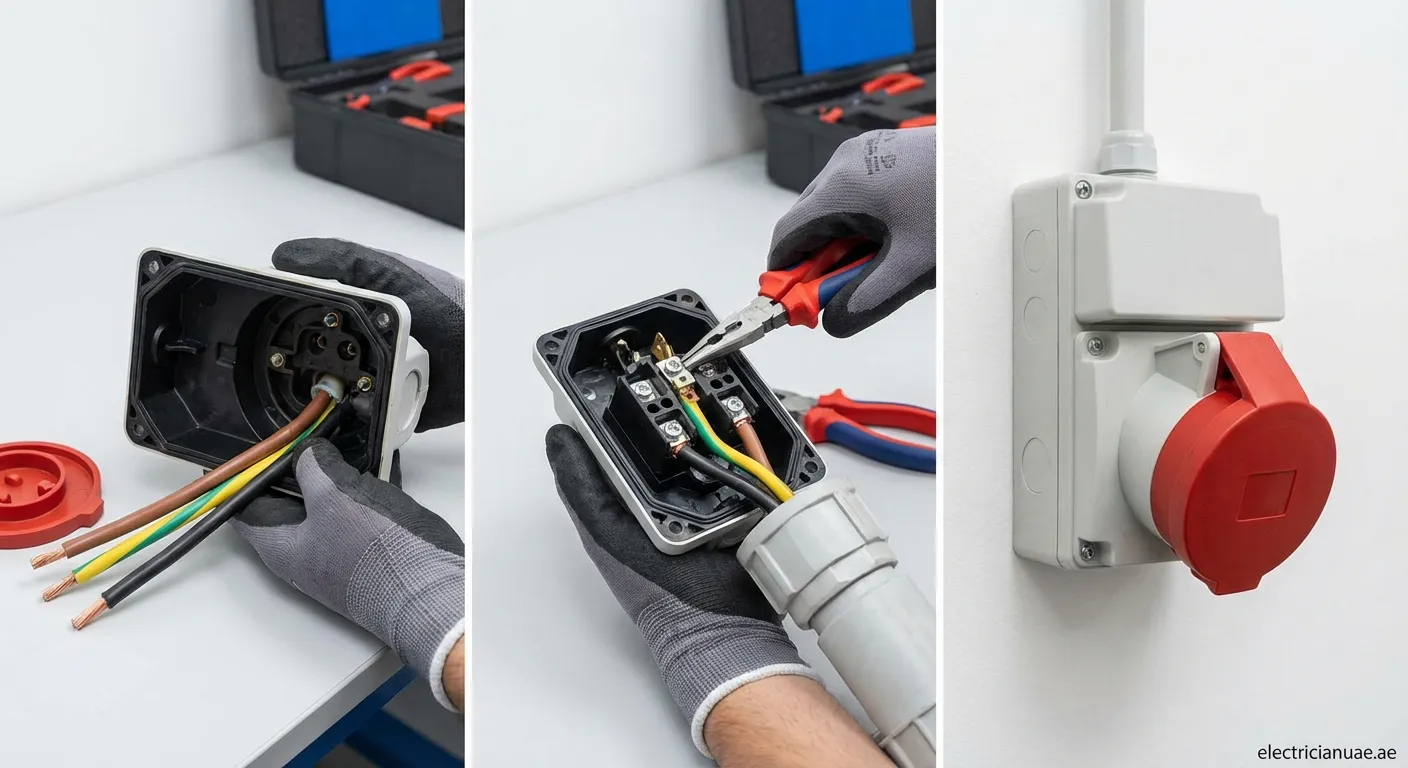
Step-by-Step Wiring Process
Step 1: Prepare the Cable Entry Point
Install the appropriate cable gland into the socket housing entry point. The gland provides:
- Mechanical strain relief
- Environmental sealing (IP rating protection)
- Prevention of cable damage at entry point
Tighten the gland nut sufficiently to grip the cable without crushing it.
Step 2: Strip Cable Conductors Properly
Strip back the outer sheath approximately 50mm to expose individual conductors:
- Cut carefully to avoid damaging conductor insulation
- Strip each conductor insulation by 10-15mm for terminal insertion Twist stranded conductors slightly to prevent loose strands.
Step 3: Connect Ground Wire First Always begin with the protective earth connection:
1 Locate the PE or E terminal (usually marked green/yellow) 2 Insert the ground conductor fully into the terminal3 Tighten the securing screw firmly4 Gentle pull-test to verify secure connectionThis sequence ensures grounding is established before other connections.
Step 4: Terminate Phase and Neutral ConnectionsConnect remaining conductors according to the specific configuration:
Three-phase sockets: L1→L1 terminal; L2→L2 terminal; L3→L3 terminalSingle-phase industrial sockets: Live wire to L terminal; Neutral to N terminalEnsure all connections are tight using appropriate screwdriver torque.
Step 5: Secure All TerminationsPerform final checks on all terminations:
Inspect each connection visuallyVerify no exposed copper beyond terminalsEnsure cable gland properly securedCheck overall wiring neatness within enclosureAvoid over-tightening which can damage terminals.
Testing Your InstallationTesting verifies correct installation before energizing:
Perform Continuity TestsUsing a multimeter on resistance mode:Check earth continuity from cable entry to PE terminalTest between phases for correct routingVerify no short circuits between conductorsVoltage Testing After EnergizationAfter restoring power (carefully following procedures):Measure voltage at socket terminalsVerify correct phase rotation (three-phase)Test neutral-to-earth voltage levelsConfirm readings match expected valuesCommon Mistakes to AvoidEven experienced electricians can make errors: Loose terminations causing heat buildupIncorrect phase rotation affecting motorsMissing or poor earth connectionsInadequate cable gland tighteningWrong cable gauge for current requirementsImportance of IP RatingsIndustrial environments often require specific protection levels: IP44 Minimum splash protectionIP55 Dust and water jet protectionIP67 Temporary immersion capabilitySelect appropriate rated enclosures for environmental conditions.Professional Certification ConsiderationsMany jurisdictions require: Licensed electrician sign-offPeriodic inspection certificatesCompliance with local electrical codesDocumentation of installationsAlways check local regulatory requirements before proceeding.
Final Steps and Safety Check
Wiring an industrial socket requires careful planning, proper tools, and adherence to safety standards. By following this guide, you can ensure a safe and reliable connection for your equipment. If you need professional assistance with power installations or troubleshooting complex electrical systems in Al Juraina, our experts at Power-tripping-fix Al Juraina are ready to help.