How to Wire a Water Cooler: A Complete Guide
Understanding how to wire a water cooler is vital for safety. This guide explains the electrical connections needed to install your dispenser correctly and prevent electrical hazards.
Installing a water dispenser involves more than just plumbing; ensuring the electrical connection is safe is paramount. This guide focuses on how to wire a water cooler correctly, adhering to safety standards to prevent electrical shock and ensure efficient operation. Whether you are setting up a bottle-less system or a standard dispenser, understanding the wiring requirements is the first step.
Understanding the Electrical Requirements
Before you attempt to learn how to wire a water cooler, you must inspect the appliance's data plate. Most residential and office water coolers operate on standard 115/120-volt AC circuits. However, heavy-duty commercial units may require different voltage.
- Voltage: Check if the unit requires 120V or 240V.
- Amperage: Ensure the circuit can handle the amp draw (usually between 1.5 to 5 amps for cooling and heating).
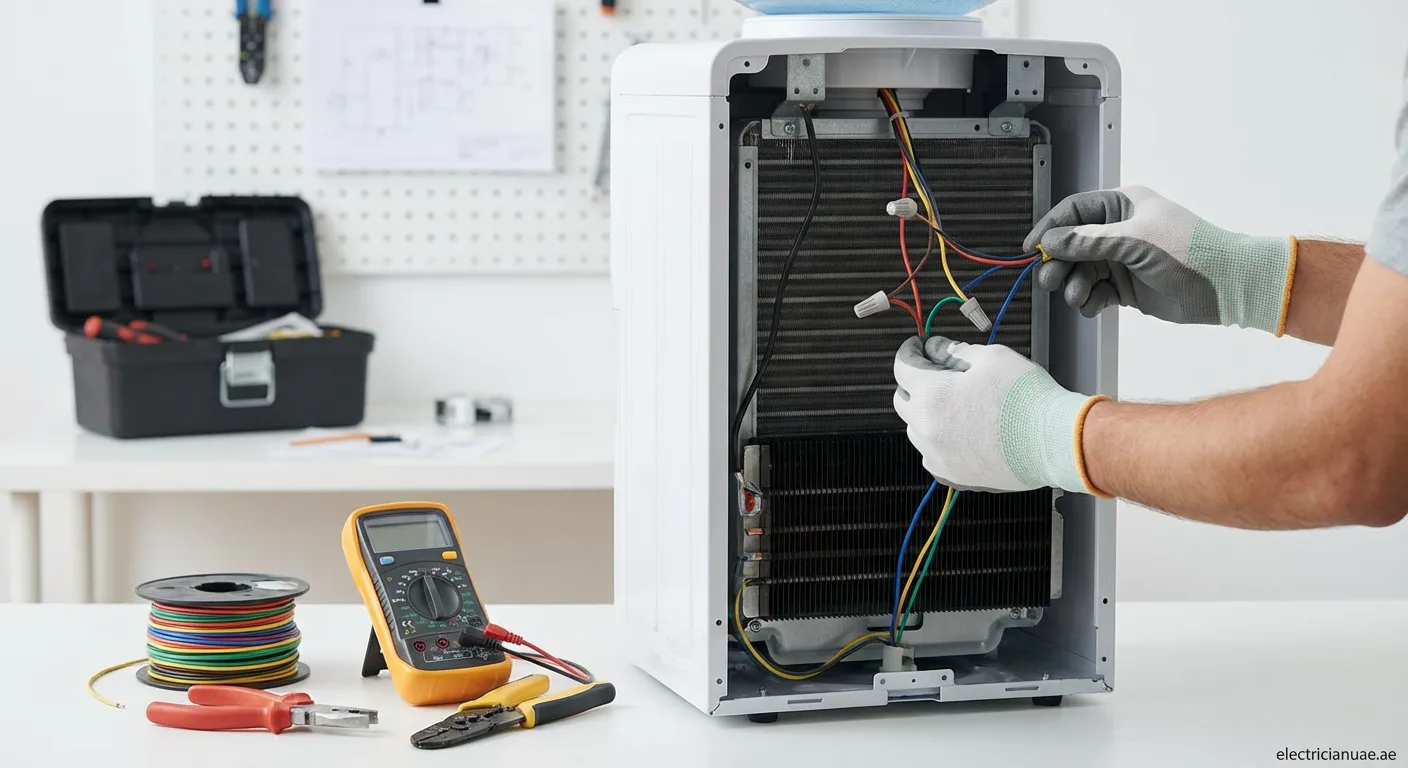
- Grounding: Water and electricity are a dangerous mix. Proper grounding is non-negotiable.
Essential Tools for the Job
To safe perform the installation, gather the following tools:
- Voltage tester or multimeter
- Wire strippers (if hardwiring)
- Screwdrivers (Phillips and Flathead)
- Electrical tape and wire nuts
- GFCI outlet (highly recommended for wet areas)
Step-by-Step: How to Wire a Water Cooler
While many units are "plug-and-play," built-in units often require direct wiring. Here is the general process.
1. Circuit Preparation
Ensure proper circuit capacity. Dedicated circuits are preferred for water coolers with heating functions to prevent tripping breakers. If you are wondering how to wire a water cooler into an existing circuit, calculate the total load first.
2. Installing a GFCI Outlet
For safety, the power source should be a Ground Fault Circuit Interrupter (GFCI).
- Turn off the main power at the breaker.
- Connect the black (hot) wire to the brass screw.
- Connect the white (neutral) wire to the silver screw.
- Connect the bare/green wire to the green grounding screw.
- Secure the outlet and restore power to test.
3. Hardwiring a Built-in Unit
Some sleek, bottle-less units are hardwired behind the wall.
- Isolate Power: Never work on live wires.
- Match Wires: Connect the unit's black wire to the supply black wire, and white to white using wire nuts.
- Grounding: Securely connect the ground wire to the chassis or the supply ground. This is the most critical step when learning how to wire a water cooler to prevent shock.
Common Wiring Mistakes to Avoid
- Ignoring Grounding: Never cut off the third prong on a plug.
- Overloading Circuits: Do not plug the cooler into a power strip loaded with other high-draw appliances like microwaves or coffee makers.
- Exposed Wiring: Ensure all connections are housed inside a junction box or the unit's casing to protect them from moisture.
By following these guidelines on how to wire a water cooler, you ensure a safe supply of cold and hot water without risking your building's electrical integrity. Always prioritize safety over speed.
Safety and Final Wiring Tips
Proper electrical setup prevents hazards and extends appliance life. If you need professional help, remember that we also have a service in Humaideya 1. Visit our Socket-installation Humaideya 1 for expert assistance with your power needs.